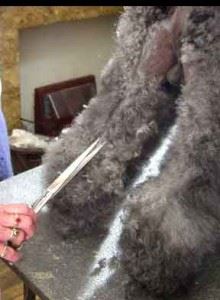
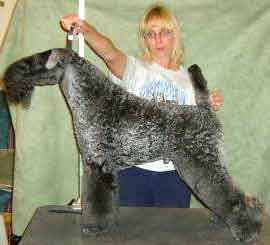
Kerry Blue Terrier Grooming – Step By Step Scissoring Skills To learn to scissor evenly, practice in mid-air, preferably in front of a mirror. To hold your scissors properly, put your thumb through the thumbhole only to the first joint. Your ring finger goes through the smaller finger hole. Your index finger and middle finger should be placed on the scissor shank in front of the finger hole. Put your little finger on the finger rest if your scissors have one. Practice scissori I always trim my Kerries square first and then go back and round off the corners. That is, I cut in the outline pattern from one angle, the side profile for instance, then go back and make sure the edges are rounded. I might square-cut the side view, then the front view, and finally the rear view. I then go back and blend all sides. You may have your own preferred sequence when trimming, but be sure to be consistent, so that you become comfortable with your system. Clipper Work Normally I do clipper work 3 or 4 days prior to a show, trimming in the direction of the growth of the coat using a #30 blade. If pressed for time closer to the day of a show, I may use a #15 blade and trim against the growth of hair. Be sure your blades are sharp and properly lubricated, so you will get an even cut. Proceed cautiously with the clippers to avoid burning your Kerry’s delicate skin.
Trim ears inside and out. It is best to pluck hair from the car canal several days before the show. You should clean the ear canal before you clipper the ears. When clippering the inner side of the ear flap, be careful not to irritate this sensitive area. Take your time. On the outside, trim the ear to the skull, including the whole bell. Again, do not upbraid the skin in your determination to get every little hair. You must be very careful when trimming the outer edges of the ear, in order to avoid catching the delicate flaps of skin along the outer edge of the ear.
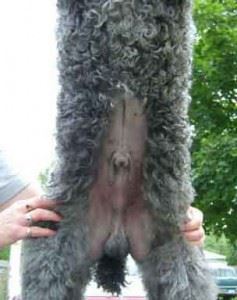
The side of the neck can be tricky. I place the clippers horizontally at the base of the bell of the ear. Then, using just one blade width, rotate the blade in a quarter circle, making a half-heart shaped pattern just behind the bell of the ear. Then, curve the shaved line down into the V-shape on the front of the neck. Note that some groomers trim less of the neck than others. Look at some pictures of well-groomed Kerries to choose the look you like best. Grooming styles vary when trimming the rear. Some use a clipper extensively, Trim a bitch’s underbelly from the vulva to the navel, including the nipple areas. On a male, clean the testicles, penis, and underbelly working forward to the navel. Careful!
Some groomers use clippers to trim between the pads on the bottoms of the dog’s feet. Others prefer to use scissors in this area. Either way is fine. Maybe your Kerry will have a preference in this. You could ask. That Distinctive Kerry Pattern Grooming the Kerry Blue Terrier is also a study in the art of sculpting. Many of us enjoy this challenge of sculpting an ideal Kerry. Even the great sculptors, whether working in marble or clay, made mistakes as they were learning. So, as mentioned earlier, do not be intimidated by your scissors and clippers. The medium you will be working in is hair. When you mess up, and we all do, remember that hair grows back; you can correct your work the next time. To properly groom your Kerry, you need an understanding of the Kerry standard and of anatomy. It would be a good idea to purchase a copy of the Illustrated Standard from the United States Kerry Blue Terrier Club. You may also want to find and print out several pictures of well-presented Kerries to serve as reference points. Most faults – anatomical strengths and weaknesses – can be hidden from the eye with good grooming. Structural faults, however, cannot be hidden from a good pair of hands when the dog is examined. As you groom your Kerry, you will want to emphasize the strengths and minimize the weaknesses as best you can. Every Kerry requires a slightly different trim. For example, to suggest to a groomer that the hair on the back of the neck be one inch long and the sides of the neck cut to half an inch won’t work on every Kerry. Adjustments to the trim of the neck are necessary because of individual variations in length of back and differences in placement, length, and thickness of the neck. I am going to try to explain how to trim your Kerry to look its best. Head
To trim the fall, first comb the fall forward. Then lay your scissors
The goal is to leave the foreface looking clean but strong and well filled.
Neck To trim the neck, lay your scissors against the neck behind the ear. Turn your dog’s head away from you slightly. Now trim the side of the neck down toward the shoulder, very gradually To trim the shoulder, set your scissors at a 45-degree angle. Continue cutting in this angle down the shoulder. Now, angle the upper arm at a right angle from the elbow up to the point of the Front of the chest: Lay scissors against the pro sternum, scissor vertically. Next angle scissors slightly to follow the angle of the upper arm. Be careful not to trim this area too tightly. Topline Many groomers err when grooming the topline because they do not understand where the topline is located. I made this mistake myself for years. The topline is the section of spine from the back of the withers to the front of the hip. Trim the coat in the topline area according to the height of your dog. For instance, you may want to leave the topline coat a bit longer for a smaller dog and shorter for a larger dog.
Be aware that leaving too much coat on the topline can adversely affect the dog’s outline by shortening the appearance of the neck and tail. Always consider the overall appearance of the dog before you make your compromise. The topline should end up straight and level. Next trim the hair on the back of the neck, from the occiput to the beginning of the dog’s topline, blending through the withers.
The Kerry’s croup – the area directly in front of the tail – should be strong. Be very careful not to make it slope down from the back toward the tail. Tail The tail should be wider at the base than at the tip, but it should not have an obvious Christmas tree shape. I like the tail to look like it was placed on the back vertically. To get this effect, I hold the tail up and trim the tail down toward the back, blending the tail gracefully into the back. Body
The Kerry chest should come to the elbow, not below it.
The shoulders should blend smoothly into a well-sprung rib cage. Therefore, place your scissors vertically just behind the shoulder. Make only one cut. (This will start your angle for the curve of the ribs. Kerries have well sprung ribs so round the rib cage. Leave the coat on the ribs a bit longer Legs Comb the coat down around the front feet, and while holding the coat tightly around the foot, trim around the front pads. Leave the hair slightly longer at the front of the toes. Now, when you fluff out the leg hair, the curve of the foot is already there.
To prevent the hair at the elbow from billowing out as the dog moves, carefully blend the elbow hair with hair on the back of the front leg, and also trim the hair on the inside of the front leg (armpits).
The rear feet are trimmed similarly to the front, with one exception: trim only the front side of back foot. Do not trim the hair from the back part of the foot – leave the hair at the base of the hocks.
Trim half way up the front of the hock then start the curve of the stifle. Find the knee first. It is higher up the leg than you might think. Do not cut in the curve below the knee. At the knee, curve up and slightly toward the loin with a smooth curve blending into the loin.
Trim the back of the legs close from the pinbone to the lower bend of the back of the stifle.
The angle outward towards the hock: Be sure to refer to your favorite photos before trimming the back of the leg and blend into the croup near the pinbone.
Use thinning shears to trim the back of the hock straight up and down. Do not leave too much hair on the back of the hock, but do not skin it, either.
Grooming Tips No one ever knows all there is to know about grooming. We can all learn more. Thanks I would like to thank the individuals who have taught me over the last 30 years or so. Thanks go to the late Bill Morrison, Hula Blue Kerries; Ruth Anne Reilly, Elan; Lorrie Carlton, Belle Creek; Billie Kneale, Camshron, for the anatomy in grooming lesson; Mary Beecher-Padgett; and, Bill McFadden for the exquisite grooming on Mick that made me want to experiment once again. –Terry Worful, Valtera Kerries |

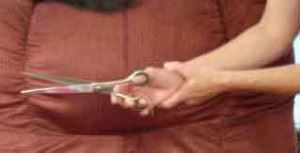 ng in the air by moving your thumb. The thumb blade of the shear is the only one that should move. To get the hang of it, you might want to start by bracing your wrist with your other hand, much as you would if you were firing a pistol. Watch in the mirror and practice until only the thumb blade is moving. Then try it after removing the bracing hand. Keep the scissors still and move only your thumb. Practice holding your hand at different angles and move the scissors back and forth in smooth lines. The less choppy your movements, the smoother your trim will be.
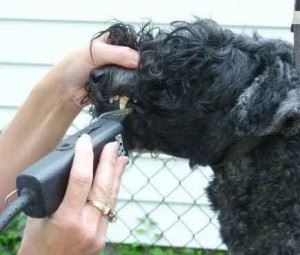 Trim under the chin, starting from the folds of the bottom lip and continuing to the neck. You will find the folds of the lower lip at about the center of the lower lip. These folds are more pronounced in some specimens than in others, but they are there. Continue trimming down to where the neck muscle starts to curve in toward the sternum. If you trim lower down than that, you will make the neck look bulky. The bottom of your neck trim should form a gently rounded “V” shape, and not be squared off horizontally. In other words, the bottom of the “V” starts above the prosternum and each side of the “V” ends at the outside bottom of the ear.
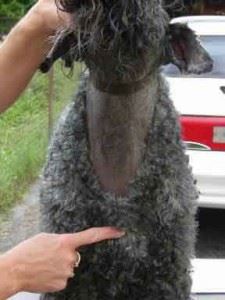
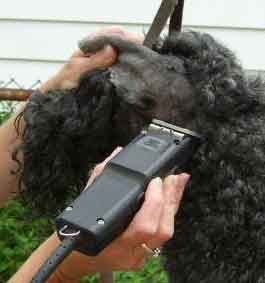 Cheeks are best trimmed just to where they begin to curve in toward the muzzle. Do not clipper any more forward than that. Trim from the back of the eye to the ear, but do not clipper the top of the head. I’ll give more instruction about scissoring the top of the head later.
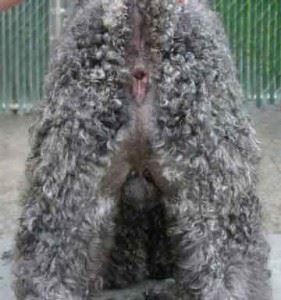 while others hardly clipper at all. When trimming the rear, I run the clippers straight up from the vulva or testicular area, across the rectum, and continue up the tail, stopping three-quarters of the way up the tail. Use a #15 or #30 blade. Just remember, this area can be sensitive. You do not want to leave a clipper burn. Inside the back legs, trim just the upper thigh, to where the muscle starts to curve inward.
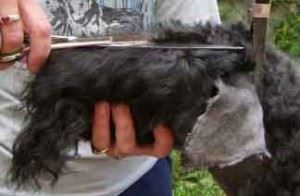 Assuming you have already completed clippering your Kerry’s head and neck as explained earlier, let’s look at the rest of the head. You will be scissoring the top of your Kerry’s head so that it looks flat. If your dog’s ears break too high, leave the hair slightly longer on the top of the head. If the ears break too low, then scissor tighter to the top of the head. Holding your Kerry under the jaw, to steady the head, carefully place your scissors on the top of the head and behind the eyes. Your scissor blades should be pointing between the ears. Do not “Mohawk” your Kerry. Instead, level the top skull bearing in mind the ear set. Be careful not to leave too narrow a strip of hair on top of the head, as that can make even a narrow head look wide. Level the hair to where the head starts to curve down toward the cheeks, then gently round that area.
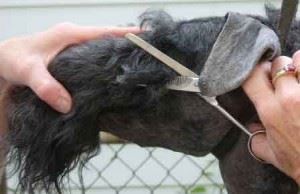 parallel to the side of the head with the shank end next to the cheek, tips pointing in the same direction as the muzzle. Trim off only those portions of the fall that flair out, leaving the sides of the fall in the same plane as the cheeks. Be careful not to angle your scissors in toward the nose as you trim. Use thinning shears from the corner of the eye to the corner of the mouth to blend the cheeks and muzzle.
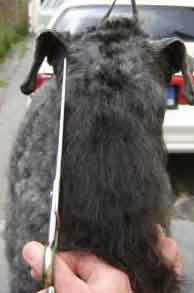
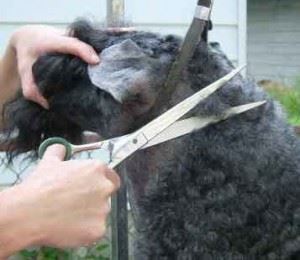 leaving the hair longer toward the shoulder.
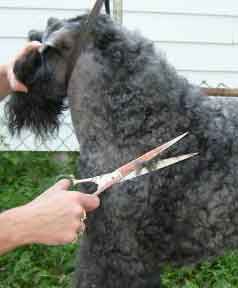 shoulder. Keep the coat fairly tight on the shoulders unless your dog is very narrow in width. Do not scissor the back of the neck just yet.
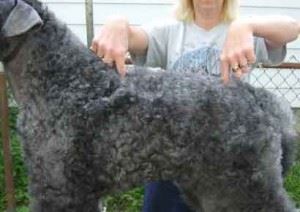
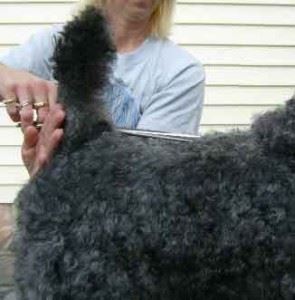 Along the dog’s back, find the point of hipbone. The angle between the croup. Adjust your scissor angle accordingly. If your dog has a low (steep) croup, then adjust the angle of the trim to give the appearance of a flatter croup. Conversely, if the croup angle is too shallow, angle down a bit lower than the pinbone. Trim these croup angles from the sides of the tail and avoid trimming too tightly over the hips.
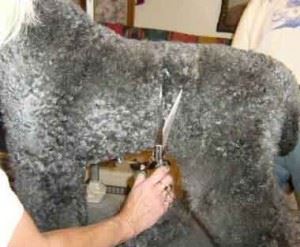 On the underside of the dog, the loin, or tuck-up, starts just behind the last rib and extends to the front of the thigh. The loin should be only about two to three inches long, depending on the size of the dog. Always trim the loin area starting behind the last rib, not working forward from the back leg. If your dog is long in loin, your goal in grooming should be to move the loin forward visually. On the male, the coat in the loin area should be trimmed even with the level of the penis.
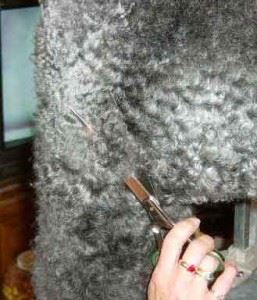 Trim the chest coat even with the bottom of the elbow joint. With the elbow and the last rib identified, trim in a straight line on the underside of the chest, from the last rib to the elbow.
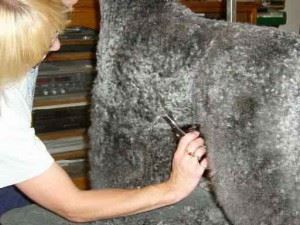
 if your dog lacks spring of rib. The loin should be trimmed slightly narrower than the ribs when viewed from above, and when viewed from the side, the dog should have a slight tuck in the loin area. Kerries do have a waist.
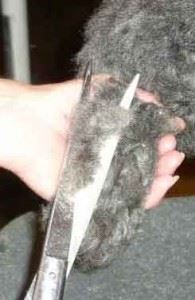 Blend the front legs from the shoulders to the feet so the leg looks straight from all angles. Some groomers hold their scissors vertically when doing front legs, but prefer to lay them horizontally.
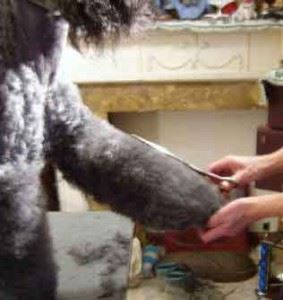
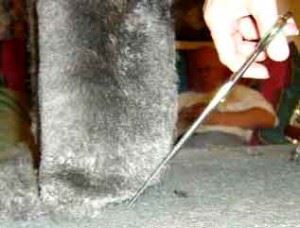 Generally speaking, hair on the backs of the front legs is left a little longer than on the fronts. Therefore, avoid trimming too closely on the back of the front leg.
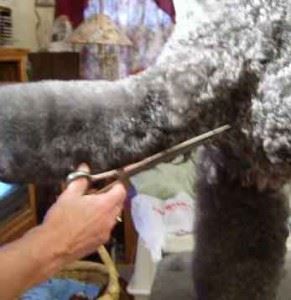
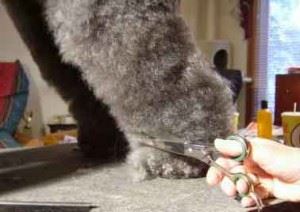
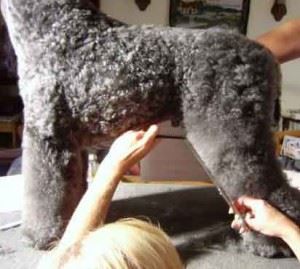
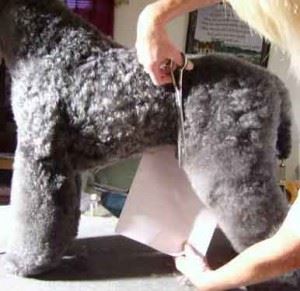
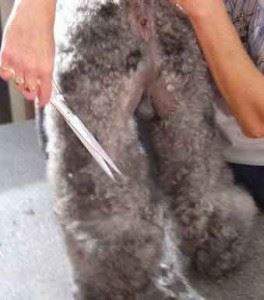 Trim the inside of the leg into a “U” shape, starting at the upper thigh, trimming downward in a straight line. This area can be trimmed closer for dogs that move close in the rear. On the outside edges of the rear legs, start out at the foot and trim straight upward towards the hip. Blend the hips into the loin and the outer portion of the leg.